How To Take Better Coin Photographs
By Denis Richard, Coin Photography Studio
May 3, 2025
12-minute read
Coin Photography Q&A: 15 Common Questions Answered
Capturing great images of coins isn’t easy — coins are reflective, detailed, and often tricky to light properly. Achieving professional results typically requires professional equipment, a meticulous setup, and extensive practice. That’s where I come in — I’m Denis Richard, a coin collector and professional coin photographer, and I've photographed thousands of coins, from tiny copper pennies to rare gold treasures. Some coins deserve professional photography, especially when precision and presentation matter. For those special coins, see my professional coin photography services. But not every coin needs that level of work. For those pieces you want to photograph yourself, I've compiled some practical tips to help you capture the best images possible. Here are answers to 15 of the most common coin photography questions collectors ask. Let’s dive in!

1. Can I use my smartphone to take coin photos?
Quick Answer: Yes – modern smartphones can capture decent coin photos. With good lighting and a steady hand (or stand), a phone camera is often enough to get started. However, dedicated camera gear will have an edge for the best detail and quality.
Advanced Answer: Not surprisingly, today’s phone cameras are pretty capable. Many recent phones have a “macro” mode or attachment that lets you focus close. You can get surprisingly sharp coin images with a phone in bright, diffused light. The key is stabilizing the phone (e.g., prop it on something or use a small tripod) and ensuring the coin is well-lit. That said, phone cameras do have limitations. They use wide-angle lenses and aggressive image processing (like high dynamic range) that can flatten out contrast and lustre . Tiny details or lustrous surfaces might not be captured as faithfully as with a dedicated camera and lens. So, while you can start with a smartphone and get good results, if you want crisper detail or more control, you might eventually upgrade to a camera with a macro lens. Think of the phone as a convenient first step – you can always practice technique and still achieve nice photos before investing in more equipment.
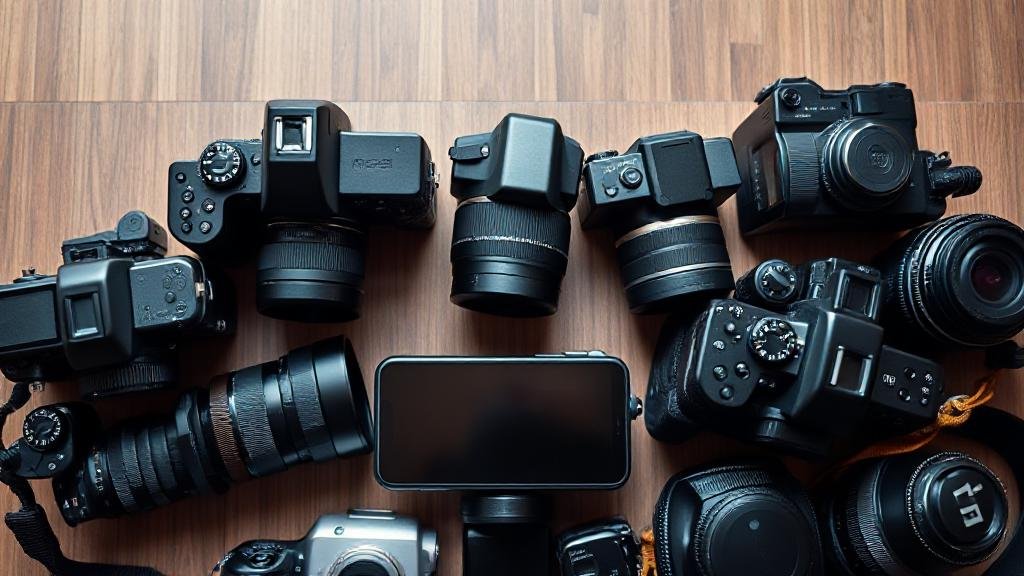
2. What kind of camera and lens should I use for coin photography?
Quick Answer: The gold standard is a DSLR or mirrorless camera paired with a dedicated macro lens. Any decent interchangeable-lens camera with a true macro lens (something in the 50–100mm range) will let you capture sharp, detailed coin images. Point-and-shoot cameras with good macro modes can work, but a macro lens on a DSLR/mirrorless gives the best results.
Advanced Answer: You don’t need an ultra-expensive camera – even older models or entry-level DSLRs can do a fantastic job. The critical part is the lens: a macro lens is designed for close focus and will capture a coin's fine details and texture. As many experts note, essentially any modern DSLR or mirrorless body will work well when you “put an appropriate [macro] lens on the front”. Common choices are 60mm or 100mm macro lenses, which provide sharp optics and a comfortable working distance. With these, you can fill the frame with the coin without needing to be so close that lighting becomes difficult. If you’re on a budget, you might consider a used older DSLR with a macro lens, or even extension tubes that turn a regular lens into a macro. The bottom line: camera – something with manual controls and interchangeable lenses; lens – a true macro lens (often 1:1 magnification) is ideal for coin photography. This setup will give you the clarity and flexibility to make your coin photos really shine.
3. What lighting should I use for coin photos?
Quick Answer: Good lighting is critical. The basic setup is to use two diffuse light sources (like LED desk lamps) angled toward the coin from opposite sides. Position them around 10 and 2 o’clock relative to the coin, at a roughly 45° angle above it. This evenly lights the coin and minimizes harsh shadows or glare. You can also use natural daylight (indirect sun or a cloudy day), which provides soft, even illumination.
Advanced Answer: Lighting will make or break your photo. Most coin photographers use diffused continuous lights – for example, two gooseneck LED lamps with frosted covers, or LED ring lights, etc. You eliminate strong shadows and get even coverage by placing lights on both sides. Be careful, though: using two or more lights at equal strength can sometimes yield a very flat-looking image (no shadows at all can mean loss of depth perception and washed-out toning). To avoid this, many folks play with lighting ratios – e.g. one light slightly brighter or at a slightly lower angle to create a hint of shadow for texture. The goal is to light the coin enough to see all details, but not so harshly that you get bright glare spots. Diffuse the lights by bouncing them off white surfaces, using softboxes, or even a simple translucent plastic cup over the coin as a diffuser. Keep ambient room lights low to avoid colour casts. Also, try to use bulbs of the same type (daylight-balanced LEDs are a great choice) so you don’t mix warm/cool tones. If you rely on sunlight, indirect window light or a bright overcast sky works well – direct sun is very intense and can cause glare, but a bit of cloud cover acts like a natural diffuser. In short, use soft, even lighting from multiple angles for best results, and don’t be afraid to adjust the light positions to find that “sweet spot” where the coin’s details pop.

I use commercial-grade lighting in my studio, but enthusiasts can still take great coin photos with simple, well-placed lights at home.
4. How do I avoid glare and reflections on the coin?
Quick Answer: Glare is usually caused by lights (or the camera) reflecting off the coin’s surface. To avoid it, adjust your light angles so nothing bright is reflecting straight back at the lens. In practice, that means not shooting with a light or flash pointing directly at the coin. Instead, use angled lighting and diffusers. You can also tilt the coin slightly or use a polarizing filter if the coin is inside a shiny holder. Essentially, change the geometry: if you see a glare, move the light or camera until the bright spot disappears.
Advanced Answer: Reflections are tricky because coins (especially proofs or polished coins) can act like little mirrors. The key concept is the angle of reflection – light bounces off at the same angle it hits. So if your light is too close to the camera’s line of sight, you’ll get a reflection (like the dreaded bright spot or the camera lens appearing on the coin).
Solution 1: Move the lights to the side or higher up. Often, positioning lights around 45° to the coin surface and not directly in front of the coin helps.
Solution 2: Diffuse the light. A larger, softer light source (or using a light tent) can reduce intense specular highlights.
Solution 3: Use a polarizing filter on your camera lens when shooting through plastic holders. A CPL (circular polarizer) can cut some reflections from slab surfaces, although it won’t do much for glare on bare metal. Photographers sometimes even use cross-polarization (polarizing film on lights and a filter on the camera) to virtually eliminate glare, though that’s a more advanced setup.
Solution 4: Try axial lighting: this involves shining light onto the coin via a 45° angled piece of glass in front of the lens, which can illuminate a proof coin very evenly. It’s great for capturing cameo contrasts on proofs, but it can cause glare on slabbed coins due to the plastic. In summary, to beat glare: adjust your light angles (often a slight tweak makes a big difference), use diffusers when needed, and keep the coin and lens parallel. With practice, you’ll find a setup where the coin is nicely lit but free of pesky reflections.
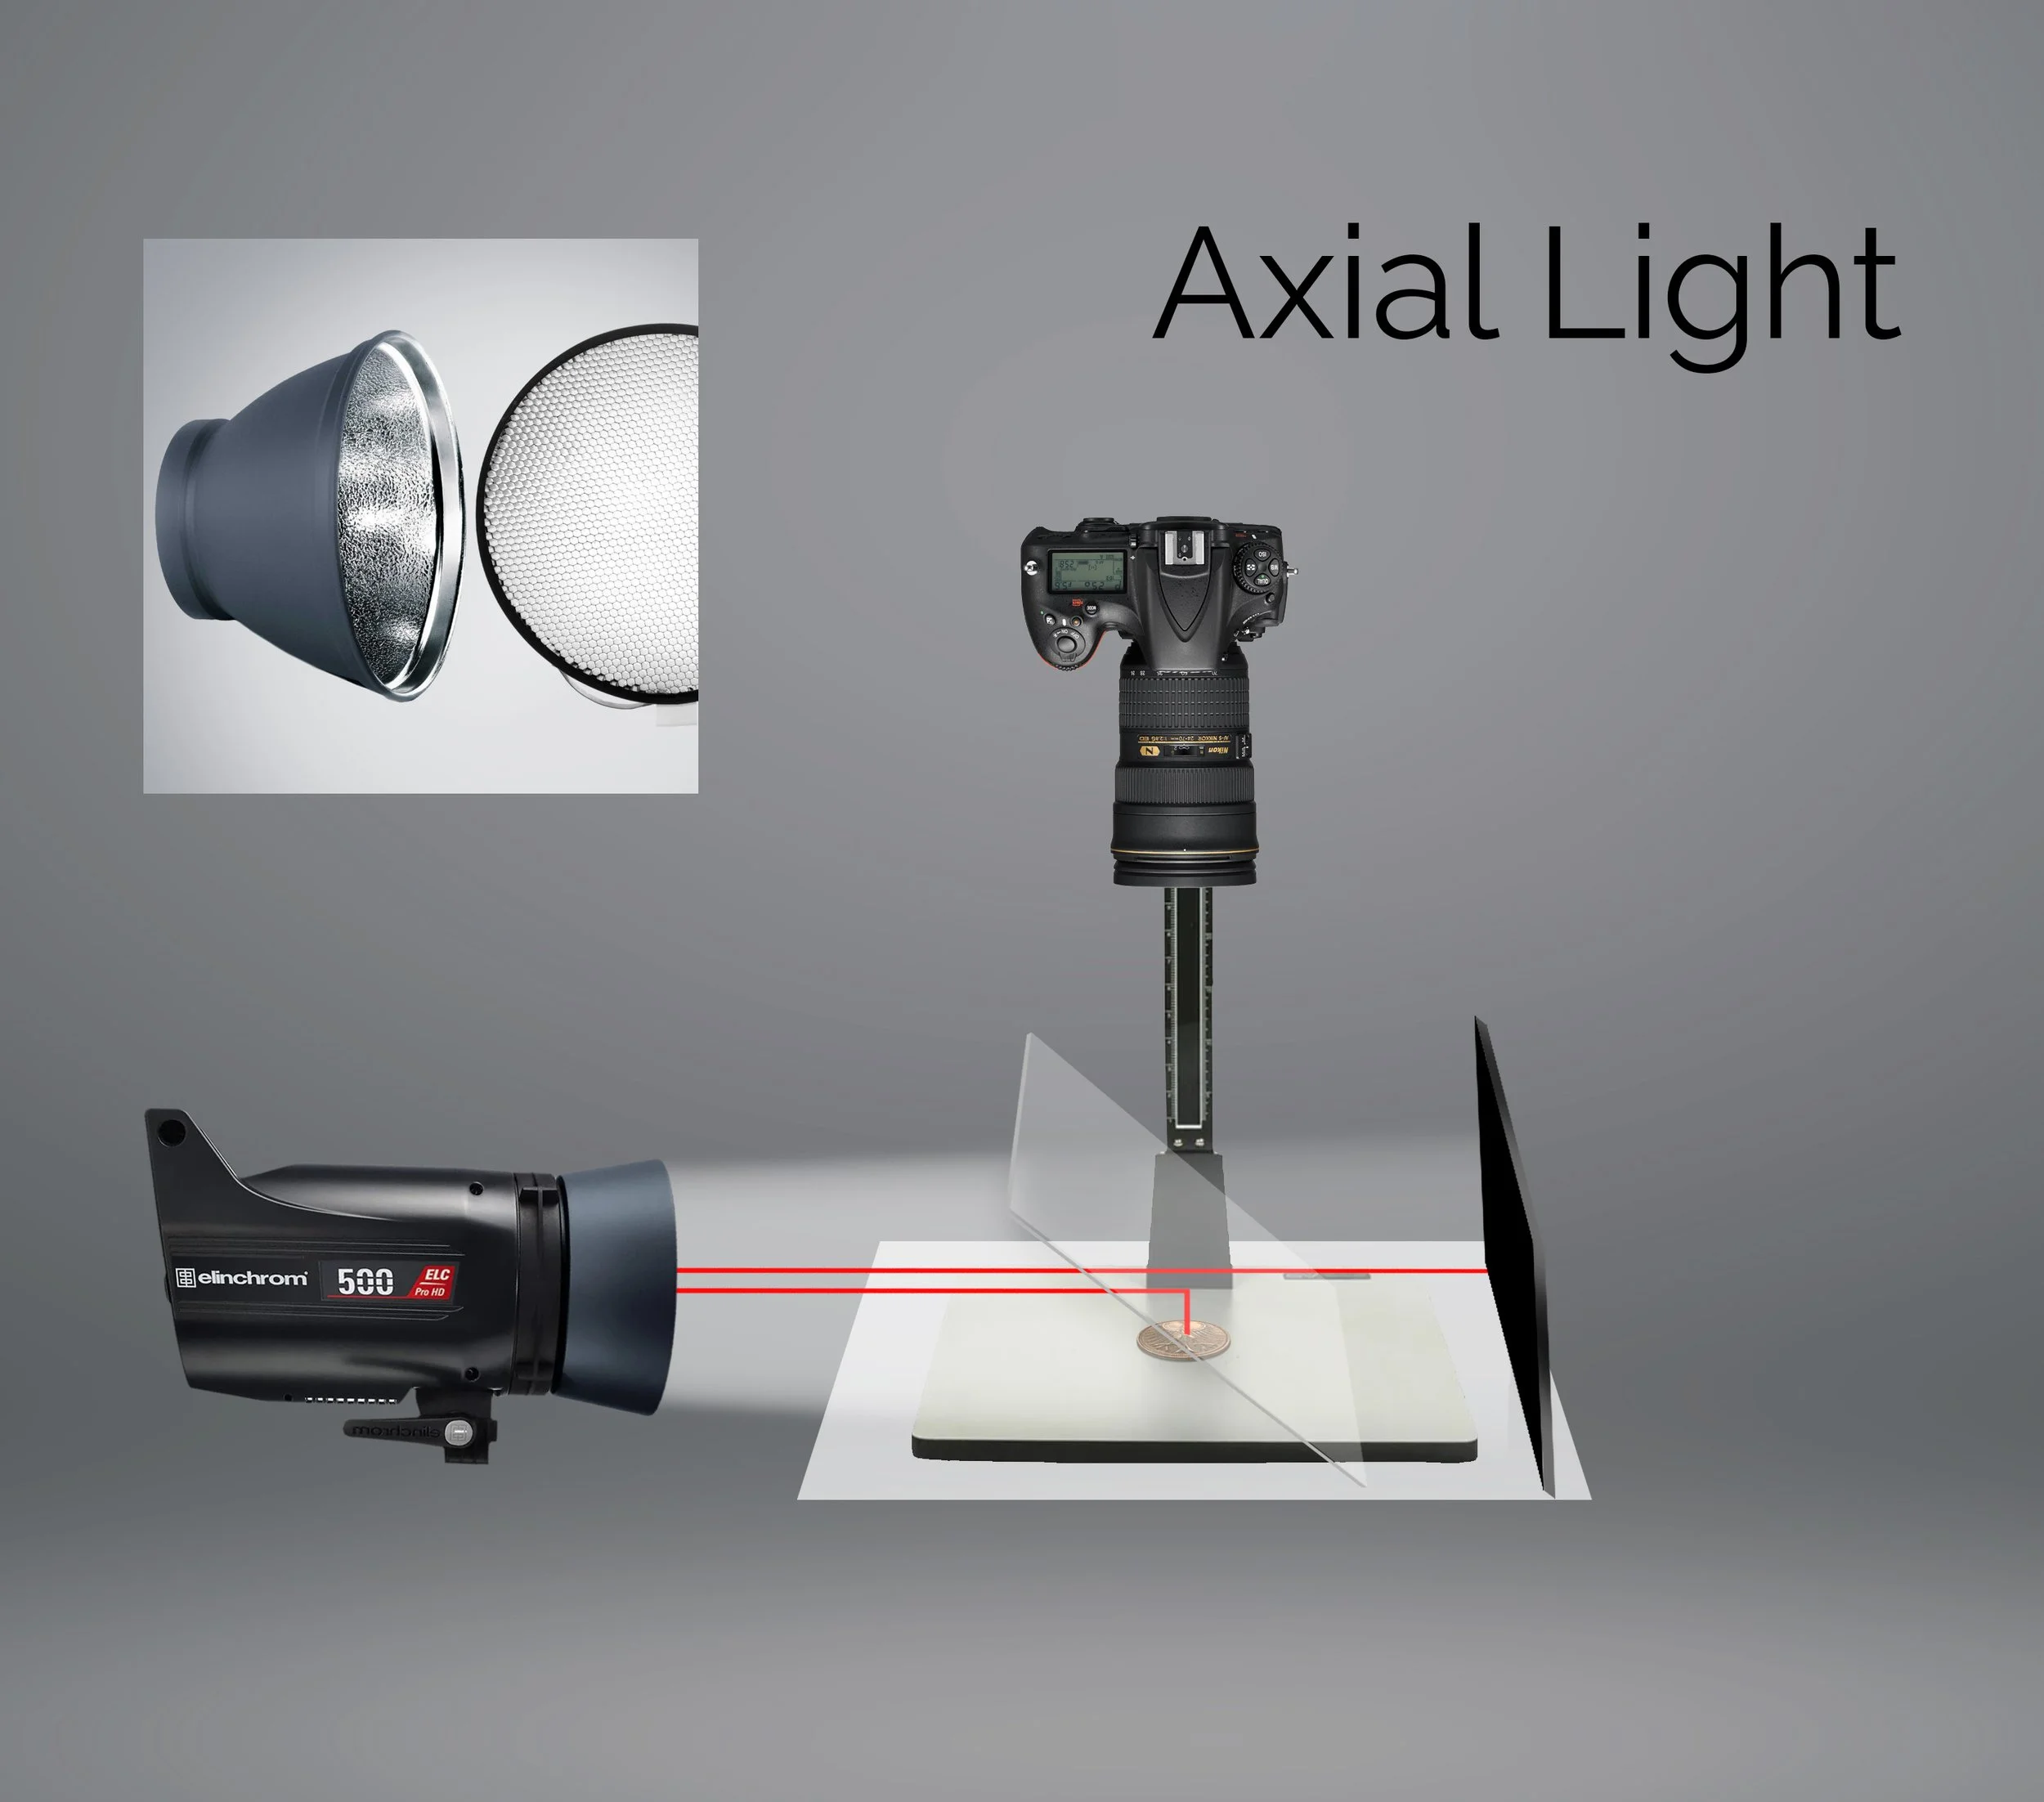
Axial lighting setup for coin photography: light reflects off a 45° angled glass to create even, low-glare illumination — ideal for photographing raw coins. On slabbed coins, however, axial lighting can increase reflections from the holder's surface.
5. Why isn’t the whole coin in focus (and how can I fix that)?
Quick Answer: If part of your coin looks blurry, it’s usually a depth of field issue or alignment issue. Make sure the coin is exactly parallel to your camera’s lens/sensor, so all parts are the same distance from the lens. Then use a smaller aperture (higher f-stop like f/8 or f/11) to increase depth of field so the entire coin is sharp. This will usually get the whole coin in focus.
Advanced Answer: Coins are basically flat, so ideally the entire surface should be in focus. The two big culprits for blurry edges are: (1) the coin not being parallel to the camera, and/or (2) using too shallow a depth of field. First, alignment: even a slight tilt means one edge of the coin is farther from the camera, making it blurrier. Ensure your coin sits flat and your camera is directly above it, perfectly parallel. Using a copy stand or level helps. Next, aperture: in macro photography, depth of field is naturally very shallow, so you need to stop down. In practice, many coin photographers find something around f/8 to f/11 is the sweet spot to get the whole coin sharp. For example, if you focus in the middle and shoot at f/8, both the top and bottom of the coin should come into focus assuming everything is parallel. Going beyond f/11 on some cameras might introduce diffraction softness, so test and see what aperture gives the best overall sharpness. If you’ve done both those things and still find edges out of focus (maybe on very high relief coins or larger coins at extreme close-up), there’s an advanced technique called focus stacking. That’s where you take two or more shots focused at different depths (say one on the date, one on the top rim) and then merge them in software for one fully sharp image. It requires a steady setup and software like Helicon Focus or Photoshop, but it can produce a superb depth of field. However, for most coin photos, simply keeping everything flat and using a reasonable aperture will solve focus problems. When set up correctly, you’ll get a nice sharp image across the entire coin.

Focus Stacking
6. How can I capture a coin’s lustre or “shine” in the photo?
Quick Answer: Lustre (that cartwheel shine when you tilt a coin) is all about how light reflects off the coin’s surface. To capture it, you need to light the coin at an angle that shows those reflections. Try using a single light at a relatively high angle, and maybe tilt the coin slightly until you see the lustre band. Essentially, move the coin or light around until the coin’s surface glints and the cartwheel effect is visible, then take the shot. It may take some experimenting with angles.
Advanced Answer: Coin lustre is the result of light reflecting off microscopic flow lines on a coin’s surface – it’s what creates that rotating “cartwheel” as the coin moves under light. The challenge is that a still photo can’t show the rotation, so we must position the lighting to catch at least part of that shine. Generally, higher-angle lighting (light from above) will bring out luster better than light at a shallow angle. High-angle light tends to reflect straight back from the flat surfaces, making the coin look brighter and more lustrous. If the lights are too low (coming from the sides), the coin might look flat or dull because the light skims off without reflecting to the camera. A common technique is to use one main light that is not completely overhead, but maybe 30–45° off the camera axis, and observe the coin as you tilt or rotate it slightly. When you see that band of light or a nice gleam across the coin’s surface, that’s the angle you want to shoot at. You can also use two lights at high angles on opposite sides to evenly illuminate while still showing luster, though be careful not to cancel out all shadows. Sometimes keeping one side of the coin just a tad less lit (to catch some shadow) and the other side lit to show shine gives a balanced result. Another pro tip: use a longer focal length or move the camera higher if possible, so you have room to get lights in at a steep angle. Photographers find that with a 100mm or longer macro, you can pull the camera back and then position lights almost overhead without the camera blocking them – this helps highlight luster across the coin. In summary, to capture luster: angle is everything. Play with the coin-to-light angle until the coin’s brilliance shows up. Once you find that sweet spot, your photo will show that beautiful sheen that collectors love to see.

7. How do I get the coin’s colour to look accurate in photos?
Quick Answer: Accurate colour comes from using the right lighting and camera settings. Use daylight-balanced lighting (or natural light) so the coin isn’t tinted by the light source. Set your camera’s white balance to match the lighting or use auto white balance and adjust as needed. Avoid mixing different types of light. If possible, shoot in RAW format and correct the colour in post. Basically, use consistent neutral lighting and calibrate your camera, and your coin’s true colours should come through.
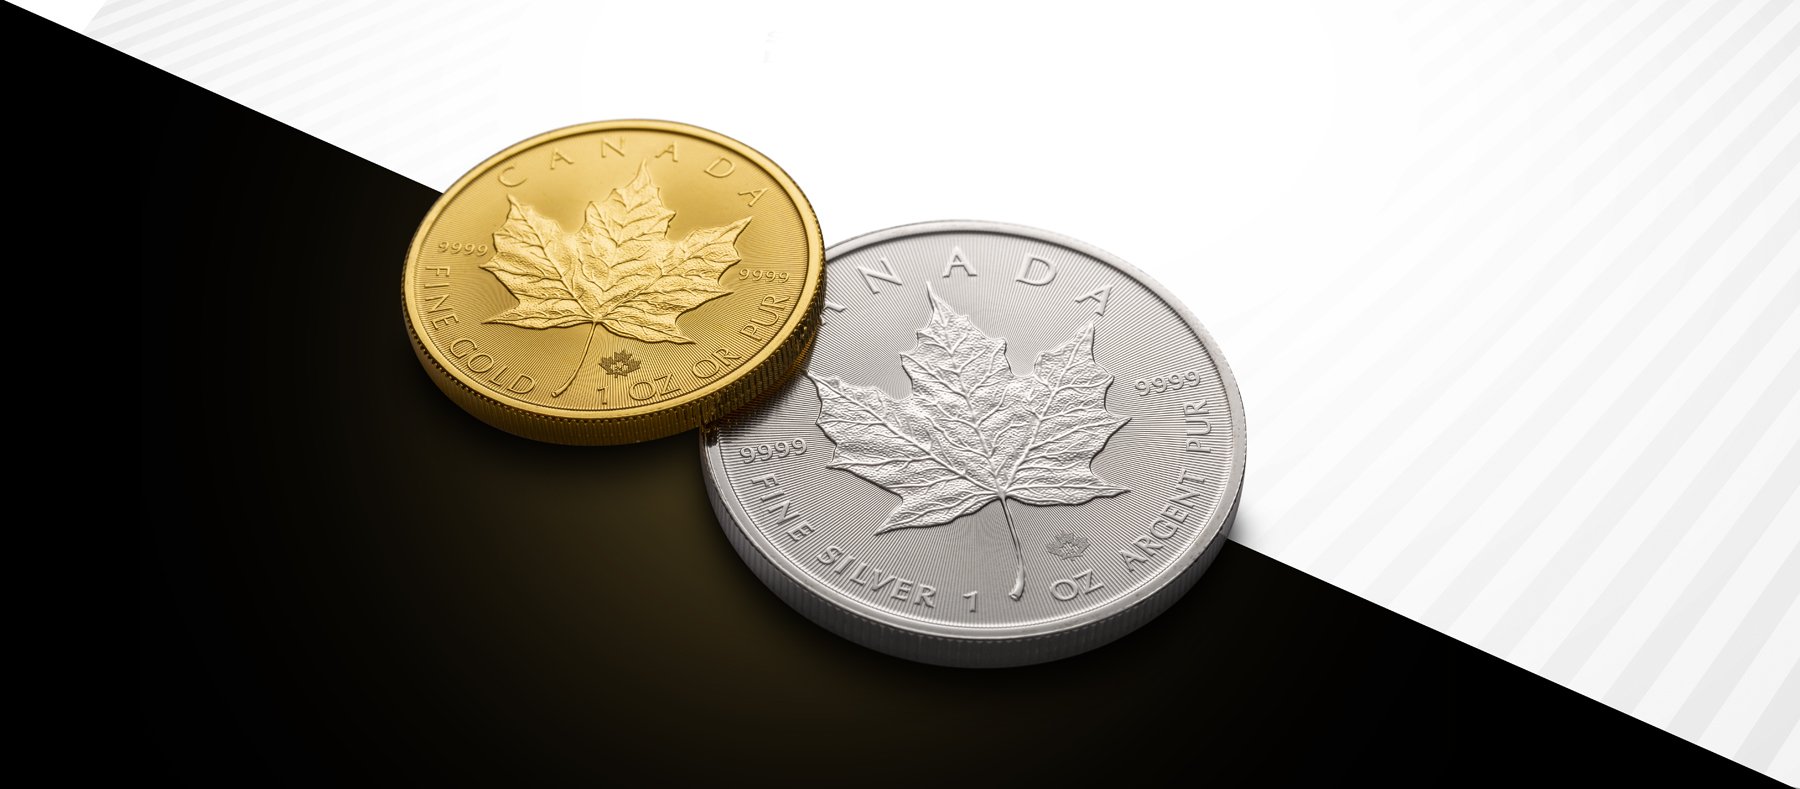
Advanced Answer: Getting the colour right can be a bit of a science. Firstly, use neutral lighting – many coin photographers use LED lamps labelled “daylight” (~5000–6500K colour temperature) to approximate neutral white light. If you use regular household lamps, you might end up with a yellow (warm) or blue (cool) cast. Whatever you use, stick to one type of bulb at a time so you don’t mix colour temperatures. Next, adjust your white balance. You can manually set the white balance on most cameras (choose the “daylight” preset if using daylight bulbs or do a custom white balance with a grey card). Some folks even include a small grey or white card in a test shot of the coin setup to use as a reference for true white balance later. If shooting with a smartphone, you might tap on a neutral area or use a camera app that allows white balance locking. For ultimate control, shoot RAW files on a DSLR/mirrorless – this lets you fine-tune colour afterwards without quality loss. In editing, adjust the temperature/tint sliders until the coin in the photo matches what you see in hand. Be mindful that backgrounds can affect the camera’s auto-exposure and white balance. A very dark background might cause the camera to over-brighten and possibly shift colour, so double-check the coin’s look. Also, consider the coin’s metal: silver and gold coins can reflect the colours of the surroundings. A trick is to surround the coin with a neutral-colored enclosure (like a white or grey foam board circle) just outside the frame, so the metal reflects a neutral tone. And of course, don’t use funky filters – they might make the coin look cool, but they’ll distort the real colour. With the right lighting and a proper white balance calibration, you should be able to capture those rich copper reds, silver greys, or gold yellows exactly as they are. When in doubt, compare the photo and coin side by side and adjust until they match.
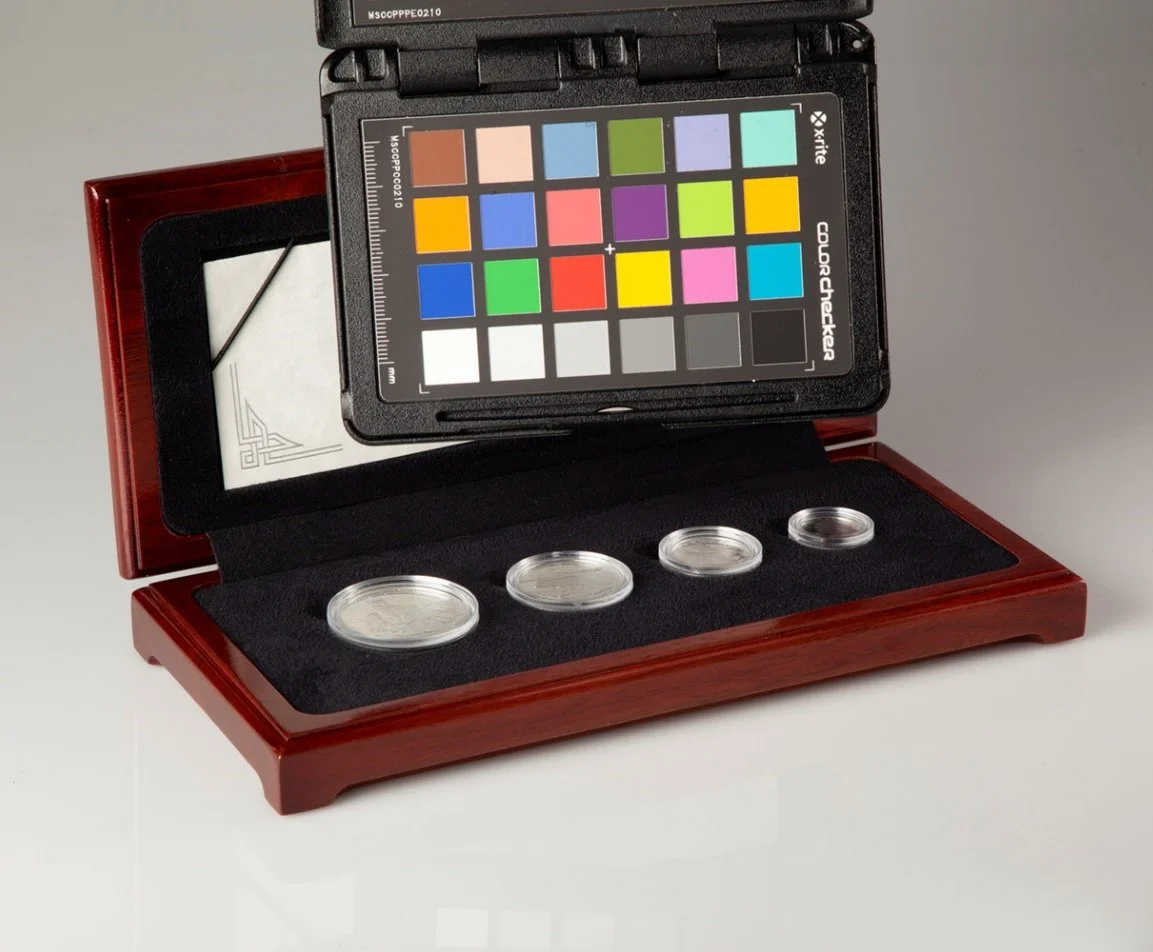
Professional photographers rely on tools like the X-Rite ColourChecker to ensure coins are captured with accurate, natural colour — a vital step in producing publication-quality images.
8. What background should I use for coin photography?
Quick Answer: A plain, non-reflective background works best. Common choices are a flat black or neutral gray background, because they make the coin stand out and don’t cast any colour onto the coin. Black velvet or matte fabric is popular since it absorbs light (no glare). The key is to use something uniform and not shiny – you want the viewer’s eye drawn to the coin, not the background. For more on the science behind your background choice, check out my Blog, The Coin Colour Illusion: Simultaneous Contrast in Numismatics.
Advanced Answer: Backgrounds can subtly affect how your coin looks. Black is a classic backdrop – it provides strong contrast, especially for silver or gold coins, and gives a “floating in space” look. A piece of black velvet or felt is excellent because it’s non-reflective and yields a deep black tone. In fact, sticking black felt onto a card or foam board makes a handy portable backdrop that avoids any weird reflections. Gray or neutral backgrounds are also used, particularly by some auction houses and certification services, because neutral gray doesn’t fool the camera’s exposure as much and gives a balanced look. White backgrounds can work (some people place coins on white paper), but be careful: a shiny coin on a pure white background can be tricky to expose correctly and might cause glare or colour bounce. If you use white, ensure it’s not catching the light in a way that competes with the coin. Some collectors even get creative and use gradient backgrounds or textured paper, but generally, simpler is better. Also, consider material: a soft fabric or paper is better than metal or glossy tile (which could reflect on the coin). You can place the coin directly on the background or use a small pedestal (like a colored clay or a coin stand) and later crop it out or Photoshop it if you want the coin floating. If you’re photographing both sides of a coin and want to combine them in one image, often people use a black background for a clean look. One more tip: if using a dark background, watch out for dust – a speck of lint on black can stand out in a photo. Keep a can of air or a clean makeup brush to dust off the backdrop before shooting. In summary, choose a unobtrusive, neutral, and matte background. A piece of black cloth or matte board is inexpensive and works wonderfully to showcase your coin in photos.
For a detailed explanation of coins and backgrounds, see my blog post The Coin Color Illusion: Simultaneous Contrast in Numismatics
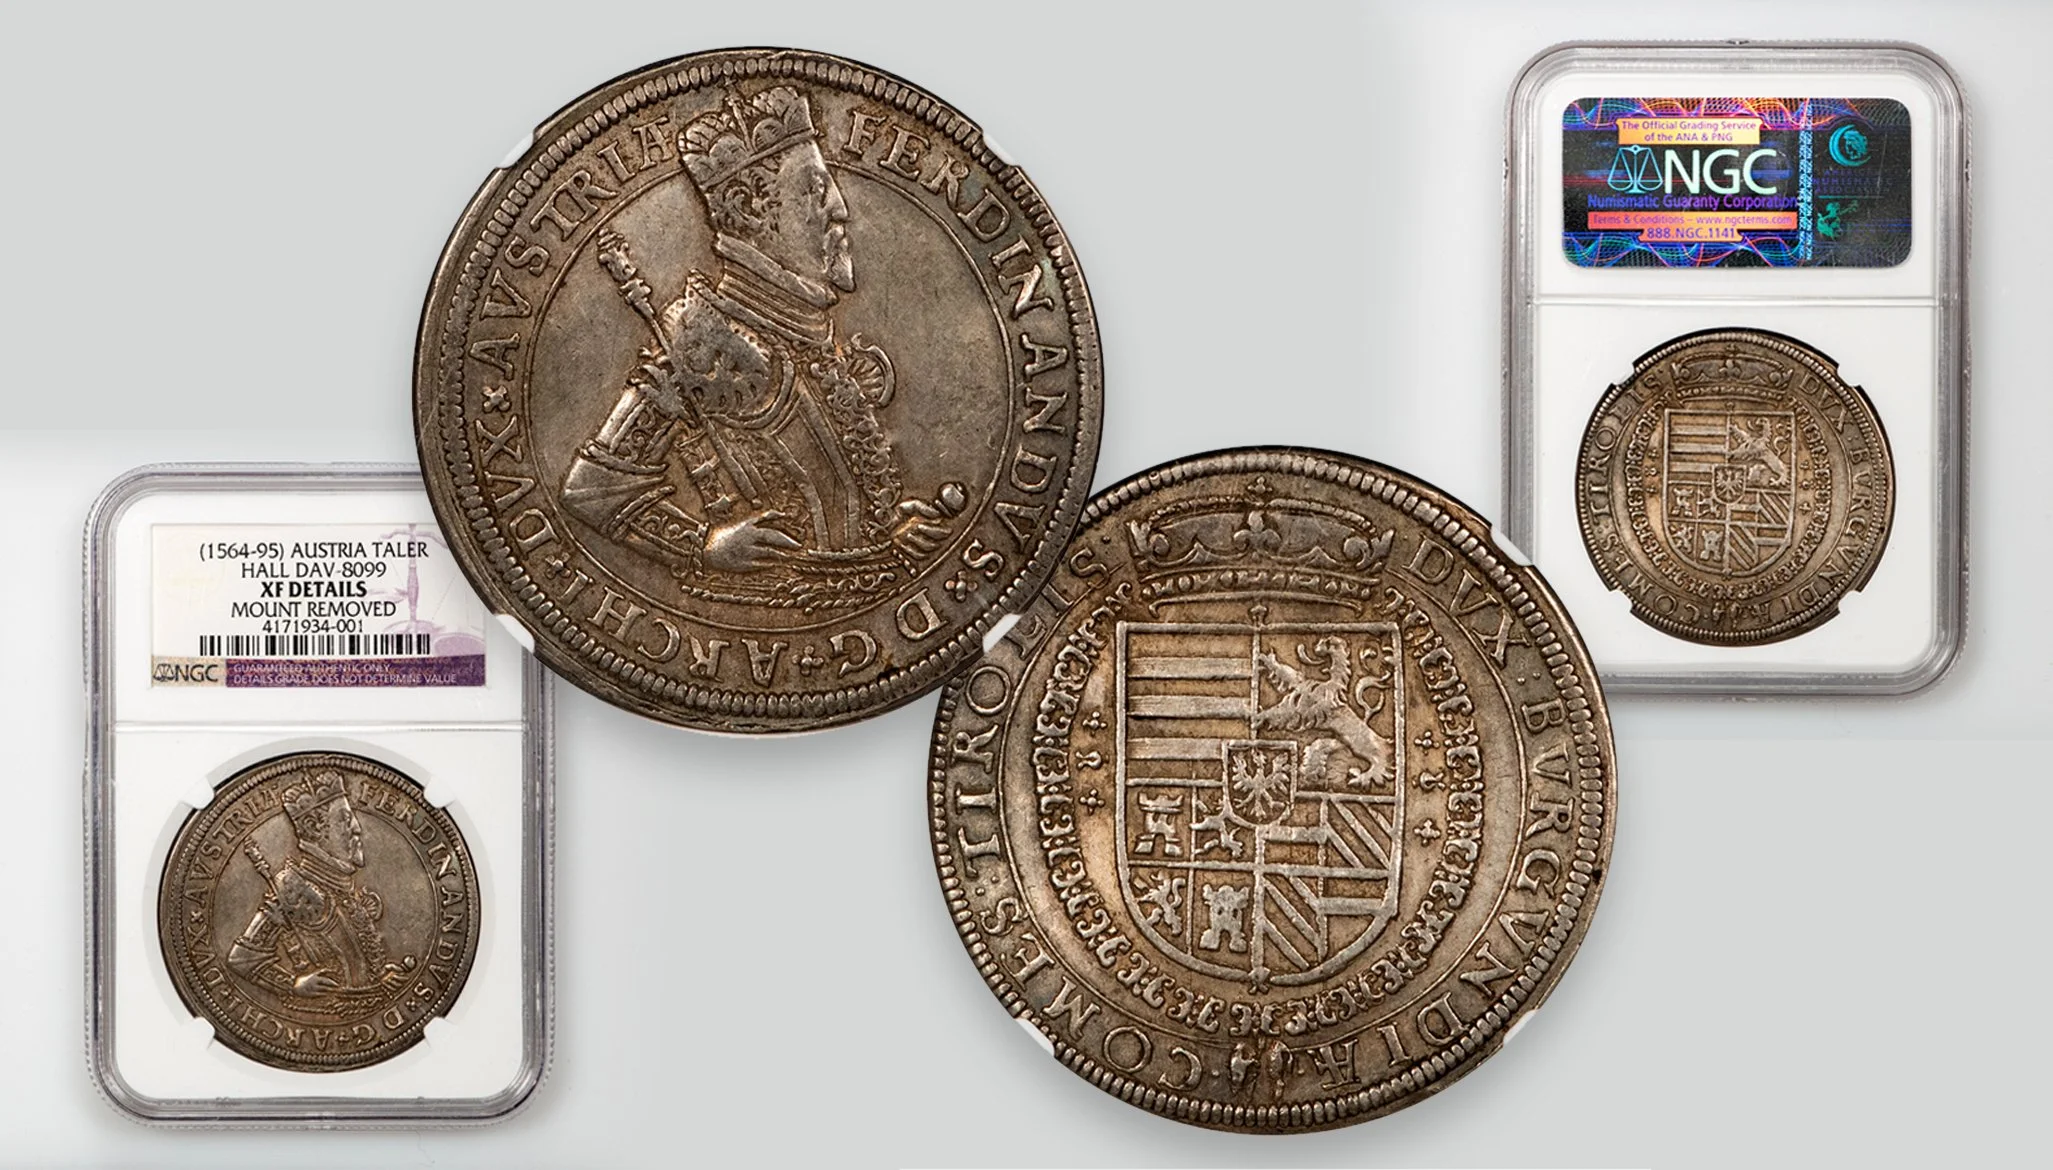
9. Should I photograph coins in their holders/slabs, or take them out?
Quick Answer:
If your coin is certified and sealed in a holder (like those from PCGS, NGC, or ANACS), photograph it inside the slab. Removing it voids the certification and can significantly impact the coin’s value. Careful lighting and techniques can minimize glare and make slabbed coins photograph well without risking the coin.
Advanced Answer:
Certified coins are sealed in tamper-evident holders that validate their grade and authenticity. Removing a coin from its slab immediately voids that certification — meaning the coin would lose its officially recognized status and, often, a substantial portion of its market value. Unless you are absolutely certain of what you're doing, do not remove a certified coin from its holder simply for photography purposes.
Instead, the best practice is to photograph the coin inside its slab using a few professional techniques. Start by gently cleaning the surface of the holder with a microfiber cloth to remove fingerprints, dust, and lint that might otherwise catch light. To minimize glare, adjust your lighting angles so that reflections bounce away from the camera, typically by positioning your lights higher or to the sides, and avoiding shooting directly into a light source. Slightly tilting the slab can also help deflect reflections without distorting the coin's appearance. A polarizing filter placed over the camera lens can further reduce surface glare from the plastic holder, especially for highly reflective coins or heavily marked slabs.
Advanced lighting setups can help create smooth, clear images for particularly difficult coins. However, they may still pick up flaws or scratches on older slabs, so cleaning and positioning remain essential. In cases where a slab is badly scuffed, some photographers apply a temporary, removable coating (such as a tiny amount of mineral oil) to fill in scratches — but this technique should be used with great caution and cleaned carefully afterward.
10. Is a tripod or copy stand really necessary?
Quick Answer: A steady camera is a must for sharp coin photos. Handholding often leads to blurry shots (especially in close-ups). So yes, you should use some form of support. A tripod works, but a copy stand (which holds the camera pointing straight down) is even better for coins. Alternatively, improvise a stand or rest the camera/phone on something. The goal is zero movement during the shot.
Advanced Answer: Macro photography magnifies every movement – even a tiny shake will blur a coin photo. A good, solid tripod will hold your camera still and also let you frame the shot precisely. As one guide succinctly puts it: a tripod “holds your camera perfectly still, so you can take super sharp photographs of tiny things”. If you plan to do a lot of coin shooting, a copy stand is a worthwhile investment. It’s a column with a mount so your camera can face downward at the coin on a table. This ensures perfect alignment and makes reproducing the same setup shot after shot easy. Some collectors use an old enlarger stand or even a homemade rig (like a piece of wood or metal arm clamped to a table) – anything that securely suspends the camera works. If you’re using a smartphone, consider a phone clamp or adapter that you can put on a tripod or stand to hold the phone steady. In addition to a stable mount, use a timer or remote to trigger the shutter. Pressing the button can jiggle the camera, so set a 2-second timer or use a remote release (or voice command for phones) to avoid touching the device during the shot. For DSLR users, mirror lock-up (or using live view, which locks the mirror) can eliminate internal vibration. All these steps ensure the camera doesn’t move at all when the photo is taken. Without a tripod/stand, you’d have to use a very fast shutter speed to try handholding, which is tough in indoor lighting and also doesn’t guarantee the exact framing you want. So yes, a stable support is basically essential gear in coin photography. It makes your life so much easier and your photos much sharper.
11. What camera settings work best for coin photos (aperture, ISO, etc.)?
Quick Answer: Use a low ISO (100 or 200) for best image quality, a moderately high f-stop like f/8 to get enough depth of field, and a shutter speed as slow as needed (since your camera is on a tripod, a longer exposure is fine). In other words: low ISO, medium aperture, and let the shutter speed adjust for proper exposure. Also, focus carefully (manual focus or use focus assist) on the coin’s front surface.
Advanced Answer: Let’s break down the key settings:
ISO: Always try to use the lowest native ISO on your camera (often ISO 100). This minimizes noise and maximizes detail. Coin photos benefit from clean, noise-free images, especially when you zoom in on fine details. Only increase ISO if you absolutely must to get a brighter image, but with a tripod and longer shutter, usually you don’t need to raise ISO at all.
Aperture (f-stop): As discussed earlier, around f/8 is a good starting point for APS-C or full-frame cameras for coins. It provides a good depth of field to cover the coin and is typically in the sharp range of the lens. You might experiment between f/5.6 and f/11 depending on your specific lens and sensor – every lens has a “sweet spot” where it’s sharpest, and every coin has slightly different depth needs. For example, a very flat coin might look great at f/5.6 (maximum sharpness), while a higher relief coin or slight tilt might require f/11 to cover the depth. Avoid going to extremes like f/22 because diffraction could soften the image. If you find f/11 isn’t enough depth of field for a larger coin (say a thick medal), consider focus stacking as mentioned.
Shutter Speed: Since you’ll be on a stable setup, shutter speed isn’t critical except for getting the right exposure. It could be 1/100s or 1 second, it doesn’t matter as long as nothing moves. Longer exposures are fine – just watch out for any vibrations (turn off any nearby fans, avoid touching the table, etc., during the exposure). One thing: if using continuous lighting, your shutter can be as long as needed. If using flash, you’ll be limited by sync speed (but most coin setups use continuous light).
Focus: Use live view if possible and zoom in on the coin to focus manually on a key detail (like the coin’s date or a central device). This ensures you nail focus on the coin’s surface. Autofocus can work too, but sometimes it might focus on the wrong part (like the holder instead of the coin), so double-check. If your camera has focus peaking (common in mirrorless), that can help identify what's sharp.
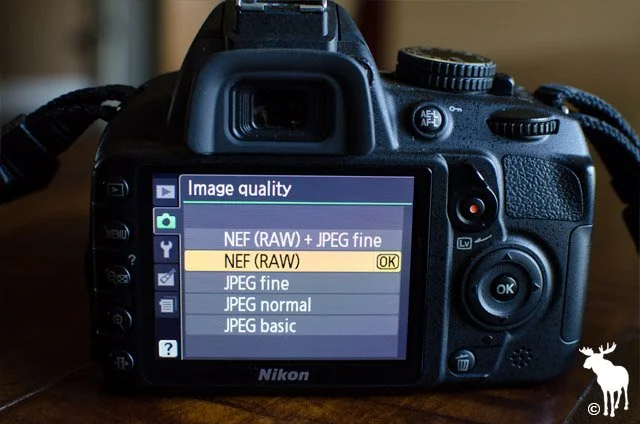
File format: If possible, shoot in RAW format. This isn’t a setting per se for the shot, but it affects post-processing. RAW will give you more latitude to adjust exposure and white balance after the fact, which is helpful for coin images.
Exposure: Make sure you don't blow out the highlights. Check the histogram – you’d rather slightly under-expose than over-expose shiny parts of the coin. You can always brighten a dark image, but if the coin’s details are pure white from overexposure, you can’t recover that. If using a grey card or known reference, you can also more precisely set exposure.
An example setup might be ISO 100, f/8, shutter 1/2 second with two LED lamps, camera on tripod, 2s timer. That will yield a sharp, detailed shot with accurate exposure. Once dialed in, you can use those settings consistently. Each coin will need a tweak (for a very shiny coin, you might underexpose a tad to save highlights), but these guidelines hold as a starting point.
12. Can I use flash for coin photography, or is continuous light better?
Quick Answer: You can use flash, but continuous light (like LED lamps) is generally more straightforward for novice coin photography. A direct flash (without a modelling light) often ends up being too harsh and creates glare or hot spots on the coin. Continuous light allows you to see precisely how the light falls on the coin before you shoot, making it easier to adjust. Most of the time, collectors opt for steady, diffuse lighting instead of flash.
Advanced Answer: Flash photography is excellent for many purposes, but capturing coins presents some challenges. A camera’s built-in flash, for instance, points straight at the coin – this will almost surely cause bright glare (especially on proof or uncirculated coins) and can wash out the coin’s surface. It’s also very small and intense as a light source, which creates harsh shadows. As one lighting tip advises, avoid spots or direct flash because it will be too harsh for metallic coins – you want a diffuse, soft light source instead. If you are comfortable with off-camera flash techniques, you can certainly do it: for example, using an external flash or studio strobe aimed at the coin from the side or bounced off a wall can produce a nice even light. But by the time you set that up, it’s akin to just using a lamp. The advantage of continuous (constant) lighting is WYSIWYG – what you see is what you get. You can move your lamps around and immediately observe how the reflections and shadows change on the coin. With flash, it’s trial and error unless you have modelling lights.
That said, some advanced coin photographers, myself included, use flash or strobe setups with modelling lights, because flash can produce immaculate, colour-accurate light and can freeze any potential vibration (though with a tripod, that’s not an issue). If you opt for the flash route, most of the time you’ll want to diffuse it heavily (for instance, put the flash through a softbox or diffuse material) and avoid pointing it directly at the subject. I don’t recommend ring flash or macro flash attachments; they will light evenly on matte surfaces, but create a ring-shaped reflection on particularly mirrored coins. Continuous LED panels or bulbs are affordable and have come a long way – many are dimmable and daylight-balanced, which is perfect for our use. So, for simplicity, I’d recommend sticking with continuous lights for coins. It’s just easier to set up and replicate results. Flash is not necessary to get quality coin images (coins don’t move, so you don’t need the freezing power of flash, and we usually want soft light, not the hardness of undiffused flash). If you only have a flash, you can make it work by bouncing or diffusing it, but otherwise, save the flash for other photography and use some steady lights for your coins.
13. Should I edit my coin photos after shooting?
Quick Answer: Some editing is usually a good idea to make your photo truly represent the coin. It’s perfectly fine (even expected) to do basic edits like cropping, adjusting brightness/contrast, and correcting white balance or colour so it matches the coin.. Sharpening a little to bring out details is okay, too. Do not over-edit or alter the coin’s appearance (no adding colours or removing marks that are actually on the coin). The goal is to show the coin accurately, so edits that improve clarity and true-to-life appearance are good; anything that misleads is not.
Advanced Answer: Post-processing is an integral part of digital photography, and with coins, it can help overcome the limitations of your camera to reflect what your eyes see. Typical adjustments I do (and recommend) include:
Cropping: Crop out unnecessary background so the coin is centred and fills the frame nicely. Many people crop into a square or circular frame for coin images.
Exposure and Contrast: Fine-tune the brightness so that the coin isn’t too dark or too bright. You might increase contrast a bit to make details pop, or adjust shadows/highlights if, say, the bright areas are a bit too shiny. Just be careful not to push it so far that the coin looks more dramatic in the photo than in reality.
White Balance/Colour: Ensure the coin’s colour in the photo matches the coin. If the white balance is slightly off, you can tweak it. For coins with toning, make sure those subtle blues or reds are visible but not exaggerated beyond what they are.
Sharpening: A touch of sharpening can help emphasize the coin’s details (e.g., the texture of the mint luster or fine lines). Most cameras apply some sharpening by default in JPEGs; if you shoot RAW, you’ll want to add that in post. Don’t oversharpen to the point of haloing or noise enhancement, though.
Noise Reduction: If you had to use a higher ISO and see some noise in the background, a bit of noise reduction can clean up the solid areas (like the background) while preserving the details on the coin.
Background edits: Sometimes, despite our best efforts, the background isn’t pure or has some lint. It’s generally fine to clean up the background in editing (like spot-heal any dust specs, or even out the black background if your lighting made it uneven). This doesn’t affect the coin itself.
What to avoid: Don’t digitally remove a scratch or spot that is actually on the coin – that crosses into altering the coin’s appearance. It’s about ethics: serious collectors and buyers expect the photo to be an honest representation. For example, if there’s a bag mark on the coin’s cheek, it should be visible in the photo. A good rule of thumb is never to make the coin look better than it does in hand – if anything, err on the side of the photo being brutally honest. As a pro, I’d rather the viewer notice a flaw in the photo than be unpleasantly surprised in person. Also, avoid heavy filters or HDR effects that can distort the look; you’re not trying to create “artsy” images that misrepresent the coin.
Another advanced edit that's acceptable is focus stacking (mentioned earlier)—that’s more of a technique than an “edit,” but it does involve merging images. It’s fine because it overcomes depth of field issues while still accurately showing the coin.
So yes, do edit your photos for polish: think of it as the digital darkroom. Your goal is to make the image look like the coin (as if the viewer is holding it). As long as you stay true to the coin’s actual look, editing is not just okay – it’s necessary to deliver a great coin photograph.
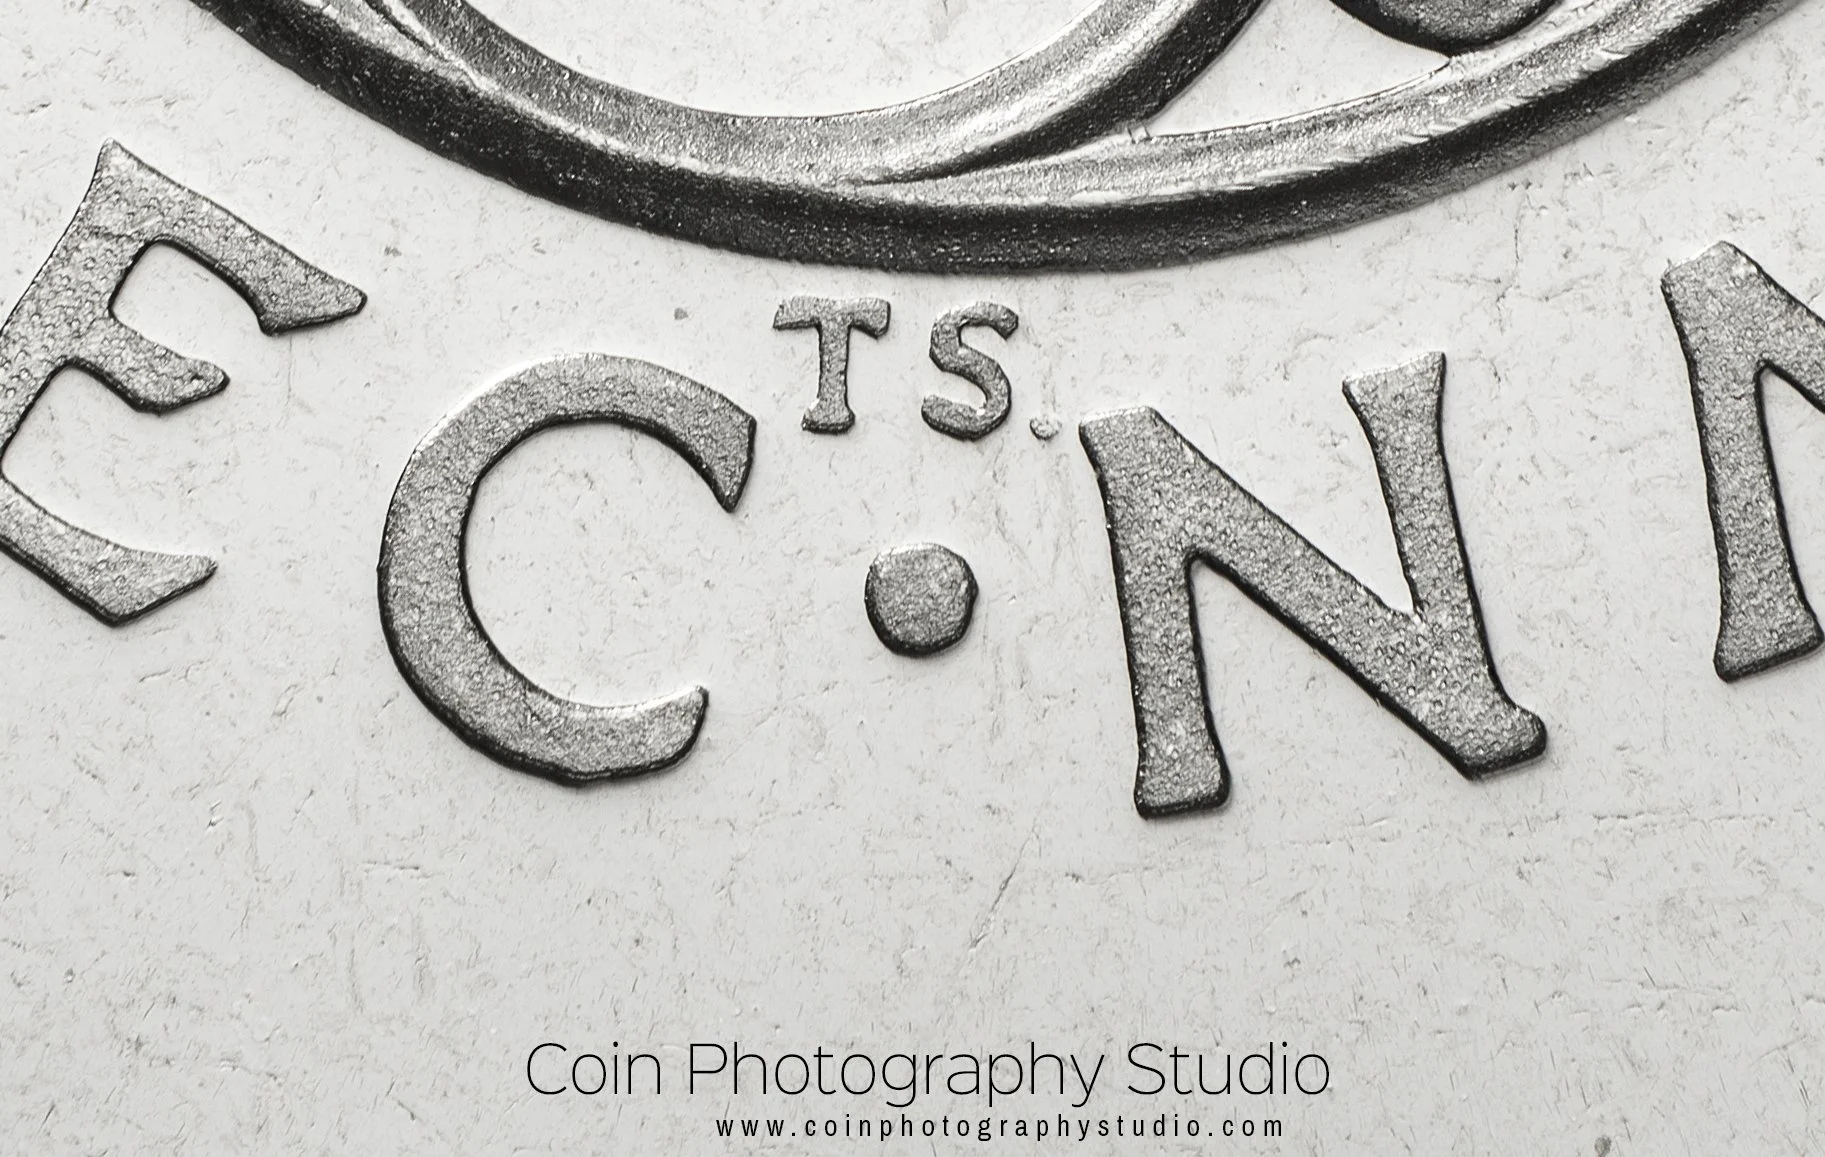
14. Any tips for capturing very small coins or close-up details (like mint marks)?
Quick Answer: For tiny coins or zooming in on details, you’ll need to maximize your magnification. If you have a macro lens, use it at its closest focus distance. You might add extension tubes or close-up filters to get even closer. Lots of light will help, because the closer you get, the more light you need. And keep everything extremely steady (even the slightest movement is magnified at high close-up). You can also simply take a high-resolution photo of the whole coin and then crop into the detail if that works better with your setup.
Advanced Answer: Shooting a really small coin (like an ancient obol ) or focusing on a tiny detail (like a mint mark or die variety) is basically extreme macro work. Here’s how to tackle it:
Gear for higher magnification: A normal macro lens might give you 1:1 magnification (the coin appears life-size on the sensor). For a very small coin, that may still not fill the frame. You can increase magnification by adding extension tubes between your camera and lens, or using a bellows for older manual setups. Extension tubes have no glass; they simply allow the lens to focus closer and give you more magnification. They are an affordable way to boost macro power if you already have a macro lens (or even a standard lens). Another option is a screw-on close-up filter (also called a diopter lens) that acts like a magnifying glass on the front of your lens. These can work in a pinch, though high-quality ones (like Raynox brand) give better results than cheap ones. If you’re dedicated, a microscope objective lens mounted on a camera (with appropriate adapters) can yield extreme magnification for tiny details, but that’s a very specialized route.
Lighting for small subjects: The closer you get, the more the lens might block light and the shallower your depth of field becomes (meaning you often stop down aperture, which again needs more light). So, you might need to add additional light or bring lights in closer. Small LED ring lights that mount on the lens can be useful for even lighting on tiny objects. Just be cautious of the ring reflection on shiny coins – you might angle it or partially block part of the ring to avoid a donut-shaped glare.
Stability and focus: Even pressing the shutter can move the camera at high magnification. Definitely use a remote/timer and a solid stand. You might also consider a focusing rail – a sliding rail that lets you move the camera in tiny increments forward/back. This is super helpful for focus because at close range, turning the lens focus ring might overshoot. With a rail, you focus the lens to a fixed close distance and then physically move the camera setup until the coin detail comes into focus. If you plan on doing focus stacking for a detail (for example, photographing the layered detail of an error coin), the rail is almost essential to get systematic focus steps.
Crops vs direct macro: If you have a high-megapixel camera, sometimes you don’t need to go crazy with extensions – you can take the best photo you can at 1:1 and then crop into the detail. Many modern cameras (and even phones) have plenty of resolution to show a mint mark clearly after cropping. The downside is you are using only a portion of the image, so make sure the focus and lighting on that detail are spot on if you plan to crop.
Alternate tools: Some collectors use USB digital microscopes for details. These can magnify a lot and show things like mint mark repunching or micro engravings. The image quality, however, is usually lower than a good camera lens, and lighting can be weird (they often have built-in LEDs that are very harsh). Still, for quick sharing of a detail, they’re an option. If you use one, try diffusing its light or using external lighting.
All in all, capturing tiny details is about pushing your gear a bit further: more magnification, more light, and rock-solid stability. It might take a bit of fiddling (and you may end up with a few out-of-focus tries until you get it right). But once you have a setup dialed in, you’ll be able to showcase that small mint mark or micro-grade coin with clarity.
15. How can I get good coin photos on a small budget?
Quick Answer: You don’t need to spend a fortune. Use what you have and get creative. For example, an older used camera (or even just your phone), a couple of cheap LED desk lamps, and some common household items can form a decent setup. You can make a copy stand by mounting your camera on a stack of books or a DIY rig. Use a simple cloth or paper as background. Many collectors successfully shoot great coin photos with very modest gear – technique matters more than expensive equipment.
Advanced Answer: Budget coin photography is totally achievable; it just takes some ingenuity. Here are some budget-friendly tips:
Camera: If you can’t afford a new fancy camera, look for a used older DSLR from Canon or Nikon, or a used mirrorless. Even a 10+ year old DSLR with around 10-15 megapixels is fine (coin photos don’t require crazy high MP, though more is nice for cropping). These older models often sell for a fraction of their original price. As one online advice says, an older/used DSLR with a macro lens can save money and still give great results. If a macro lens is too pricey, try extension tubes on a kit lens as mentioned, or find an old manual focus macro lens (adapters can let you use vintage lenses on modern cameras very cheaply).
Lighting: You can get very cheap lamps that work well. For instance, IKEA sells Jansjö LED desk lamps for under $15 each, which are popular in the coin community. Or even a couple of those clamp-on work lights with daylight LED bulbs will do. People use camping lanterns or flashlights diffused with a plastic cup– whatever provides a steady light. The key is to diffuse it: even a white plastic grocery bag can act as a diffuser over a lamp. Natural light is free – shooting near a bright window with a diffuser (curtain or paper) can yield great images without buying any lights at all.
Stabilization: If you can’t buy a tripod or copy stand, you can DIY one. Use a stack of books or boxes to get the camera to the right height above the coin. Even better, if you have some spare wood or metal rods, rig up an overhead mount. I’ve heard of people using a desk lamp stand or microphone stand to hold a camera or phone. For a phone, a simple $10 phone tripod or clamp can be worth it. In a pinch, set your phone on a coffee mug with the camera peeking over the edge pointed at the coin – whatever works to keep it still.
Background and props: Black felt or cloth is a few dollars at a craft store. Poster board or foam board (white and black) is also cheap and can be used as background or to make a little photography tent/box. A piece of glass can be handy if you want to do axial lighting (an old picture frame glass could work). A small level (to ensure your camera and coin are parallel) costs a dollar or two, or use a free smartphone level app.
Light control: For reducing glare cheaply, a polarizer filter is a bit of an investment but you can find inexpensive ones online. If using a phone, you can even take a polarized sunglass lens and hold it in front of the camera – it works in a pinch to cut some reflections!
Software: You don’t need Photoshop; there are free options like GIMP or darktable for RAW development. Even the basic editing apps on phones can crop and adjust nicely these days.
Conclusion
In essence, start small: use your phone or any camera you already have. Make a stand from household items. Use daylight or inexpensive lamps. Practice with those and see if you enjoy the process. As you refine your technique, you’ll know where you might want to invest (maybe a better lens or better lights), but you might find you’re perfectly happy with the budget setup. Many stunning coin photos have been taken with DIY setups and low-cost gear. The coins don’t care how expensive your setup is – they only care about proper focus, lighting, and technique. And those are things you can achieve with minimal expenditure. Happy shooting on the cheap!
If you'd like to see examples of what professional coin photography can look like, view my coin photography portfolio.
I hope this Q&A has been helpful! Coin photography can be a really rewarding extension of the coin hobby – it lets you appreciate and share your collection in a whole new way. You don’t need to be a professional photographer or have a big budget to get started; just a bit of patience and practice. So, give these tips a try next time you’re photographing your coins. With time, you’ll develop your own style and setup that works for you. Need help capturing important coins with professional precision? Get in touch with me here to discuss your project. Happy shooting! 😃
Note: The coin photography techniques and tips shared above are intended for non-professional collectors and enthusiasts looking to improve their own images at home. As a professional coin photographer, I use specialized studio equipment and commercial practices designed for publication-quality and archival-grade results. The advice presented here has been gathered from a combination of community expertise and broader collector experience, drawing on resources like Michael Parrish’s coin photography review, Artemis Collection guides, and discussions on leading coin forums (Collectors Universe, CoinTalk, NGC Boards, Reddit). These collective insights shaped the answers above, ensuring the information is practical, up-to-date, and field-tested by avid hobbyists.